There’s a moment that happens to most CG artists or colorists when they first render in ACES.
They look at the image and think: “this is different.” Not louder. Not more saturated. Just — more like something you’d actually see with your eyes.
The highlights don’t blow out. The colors shift as they get brighter, the way real light behaves. The whole image has a quality that’s hard to name but immediately recognizable: it looks true.
That’s ACES. And it’s been behind the look of hundreds of major productions — The Lego Movie, Guardians of the Galaxy Vol. 2, Chef’s Table — for a reason.
What ACES actually is
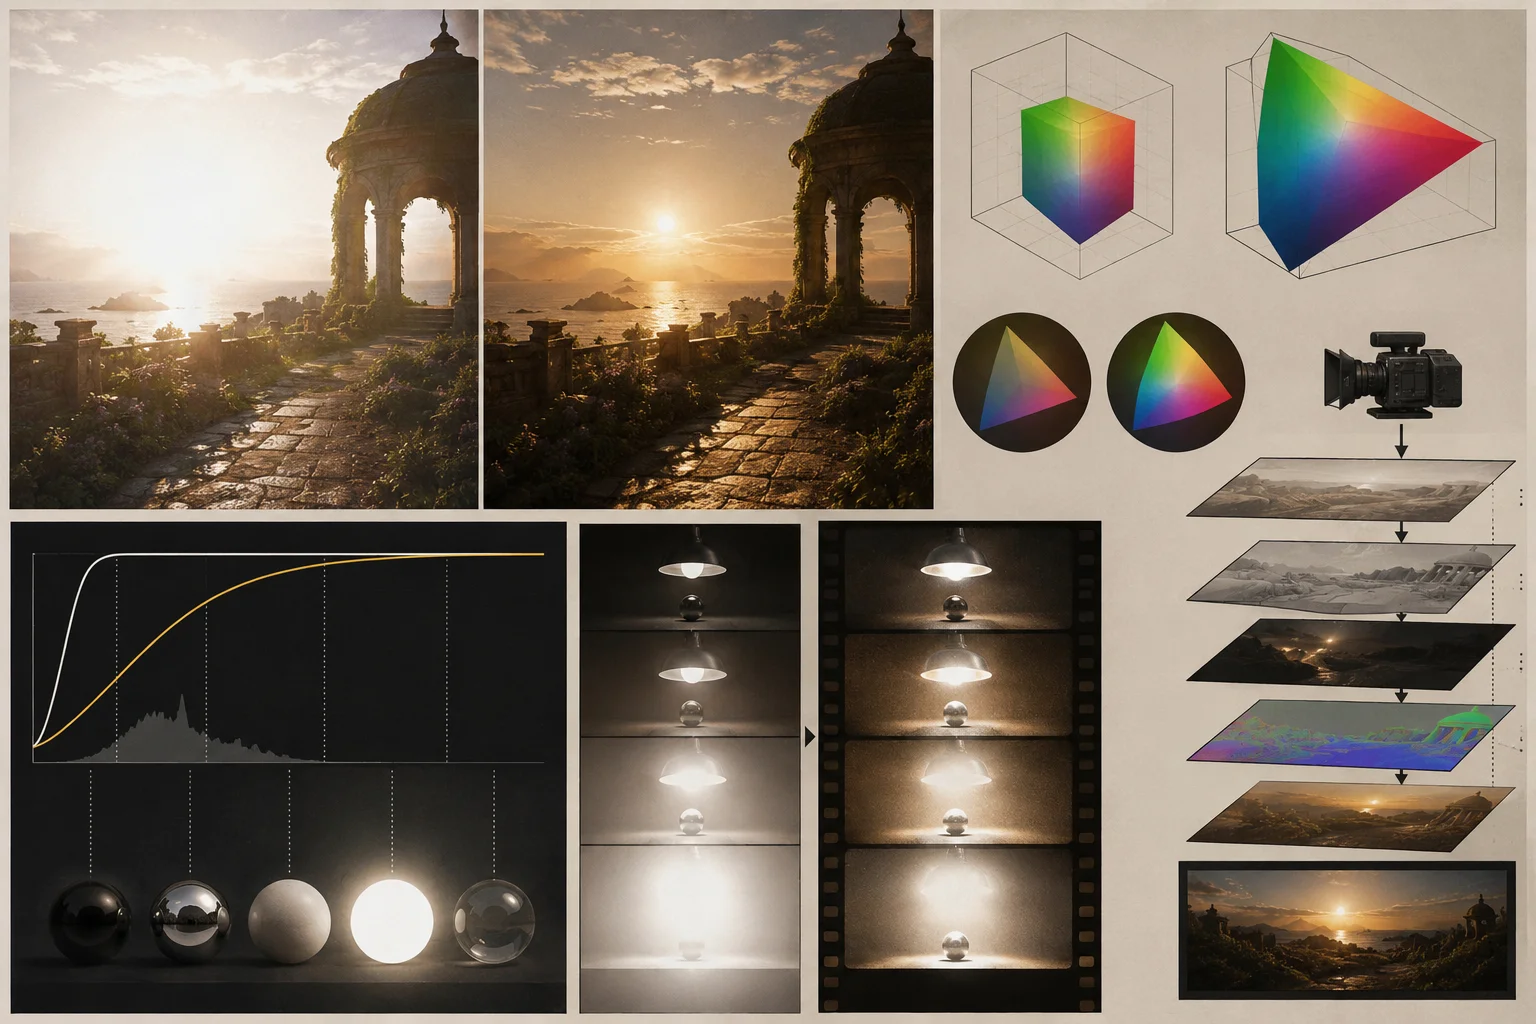
Most people hear “ACES” and assume it’s a single color space, like sRGB or Rec. 709. It’s not.
ACES (Academy Color Encoding System) is an entire framework. It includes a collection of wide-gamut color spaces, transforms to move images between them, and a set of tools for viewing and grading that work consistently across any display. Built by the Academy of Motion Picture Arts and Sciences, it was designed to be the one standard flexible enough to handle everything from camera capture to archival storage to final output.
Inside ACES you’ll find:
- ACES2065-1 — the widest gamut, used for transfer and archiving between studios. You’ll almost never work directly in it.
- ACEScg — where CG artists live. Scene-referred, linear, massive dynamic range.
- ACEScc / ACEScct — for colorists. Non-linear, maps black at 0 and white at 1. ACEScct adds a toe in the darks so grading tools behave like they used to.
- ACESproxy — for camera playback and video monitoring.
The whole system runs on OpenColorIO (OCIO), an open-source color management framework from Sony Imageworks. When you see ACES in Nuke, Maya, or Houdini, OCIO is doing the work underneath.
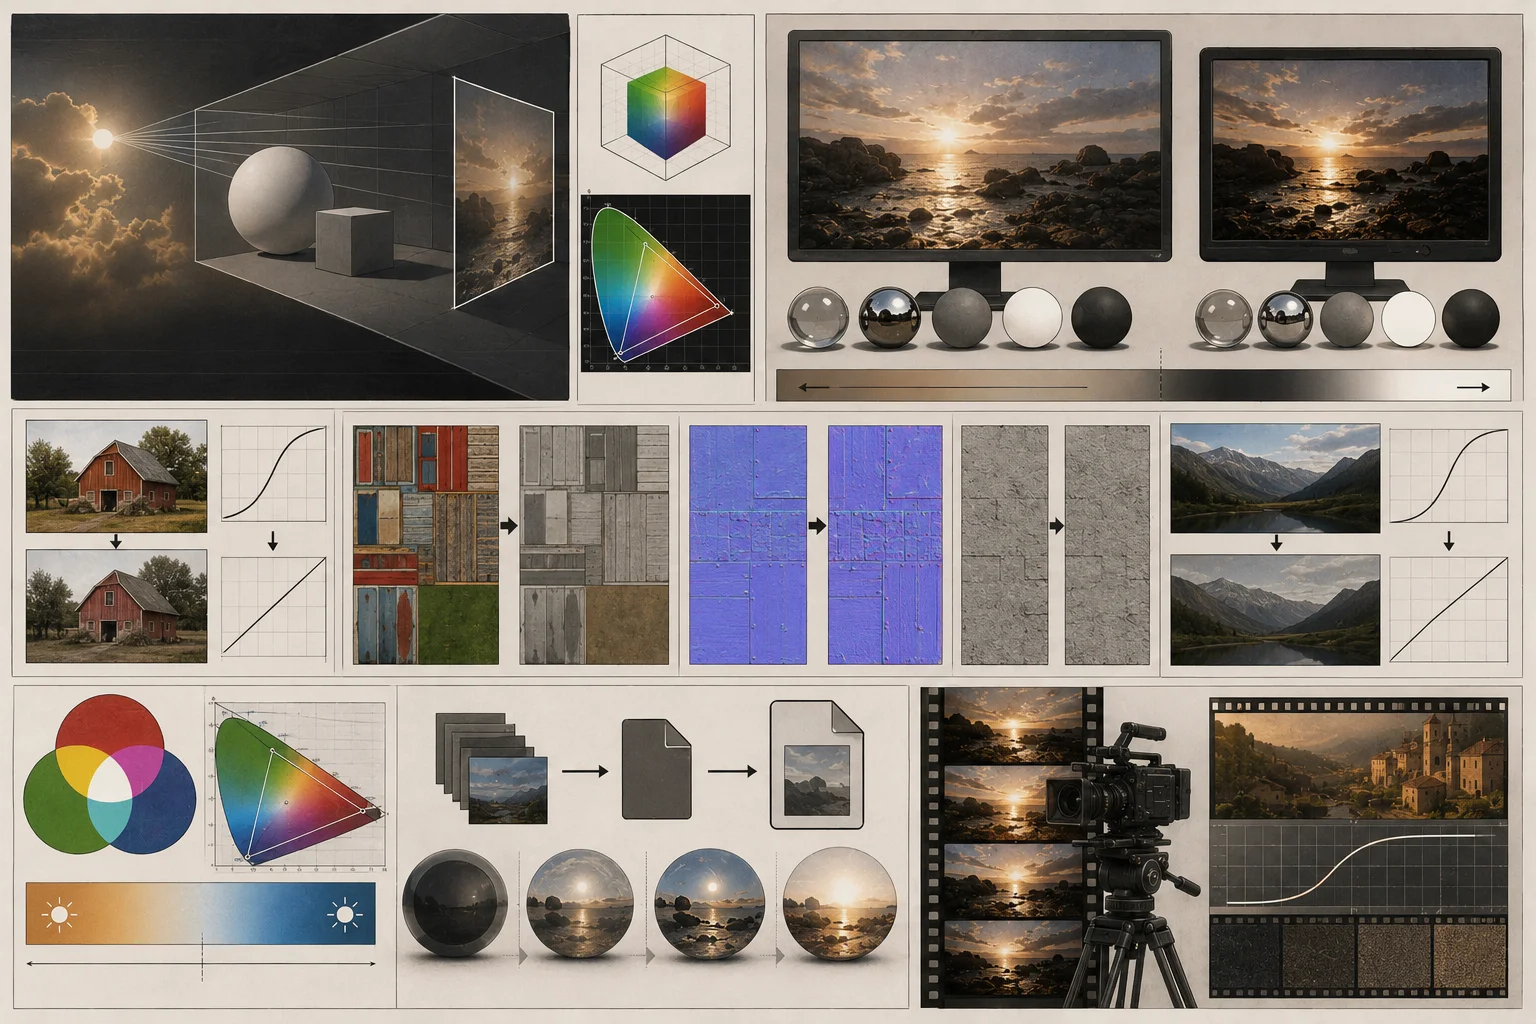
Why sRGB isn’t enough
sRGB works. Most of the world is built on it. But it has a fundamental problem: its dynamic range is narrow.
When you render in sRGB, a pixel at full brightness is 1.0. That’s it. Lights that are brighter than that just clip — pure white, no detail, no rolloff. And as your colors get brighter, they drift toward yellow in ways that have nothing to do with how light actually behaves.
In the real world, your eyes handle massive variation in brightness. A lit room, a window in the background, a specular highlight on a glass — you can see detail in all of them simultaneously. Film handles this too. That’s why highlights on photographic film roll off gracefully instead of clipping hard.
ACEScg has an enormous dynamic range. White sits at around 16.0, not 1.0. That means there’s room for light to do what light actually does — get brighter gradually, shift color temperature as it intensifies, retain detail in ways that sRGB physically cannot.
The practical result: highlights retain detail. Colors desaturate as they brighten, the way a photographer would expect. You can use realistic light values without fighting clipping. The image looks like something that could have existed in front of a camera.
The mechanics worth understanding
Scene-referred vs. display-referred. ACEScg is scene-referred — it represents real-world light values linearly. sRGB is display-referred — it’s encoded to look correct on a specific screen. You’ll never view a raw ACES image directly. It always passes through the RRT (Reference Rendering Transform) and an ODT (Output Display Transform) before hitting your monitor. This is intentional. The pipeline separates “what the light was” from “what the display can show.”
Gamma. ACEScg is linear. Most images you’d use as textures — downloaded from the internet, made in Photoshop — aren’t. They carry a gamma curve that makes them look correct on sRGB monitors. Before using them in an ACES pipeline, that curve needs to come off. OCIO handles this with utility transforms so you’re not doing it manually.
White point. ACEScg has a D60 white point. sRGB has D65. They’re different. When you convert textures into ACEScg, a proper conversion handles both the gamma removal and the white point shift. The “Utility - sRGB - Texture” transform in OCIO does exactly this.
EXR. ACES images need to live in half-float 16-bit EXR format. Not JPEG, not PNG, not 8-bit anything. EXR can hold the high dynamic range values that ACES works with. If your image isn’t in EXR, it has to be converted before it enters an ACES pipeline.
Three texture scenarios that trip people up
Diffuse color textures. Use the “Utility - sRGB - Texture” transform. It linearizes, shifts the white point, and keeps pixel values mapped between 0 and 1, so your materials behave correctly.
Displacement, normal, and bump maps. Don’t convert these at all. The pixel values in a normal map aren’t colors — they’re vectors. Converting them would scramble them. Use “Utility - Raw,” which converts the format to EXR without touching the values.
Backplates. You want the image to look identical in your 3D viewport as it does in Photoshop. Use the “Output - sRGB” transform in inverse mode. It brings an sRGB image into ACEScg with a perceptually identical appearance — the weird trick that OCIO output transforms can run backward.
Cineon and ACES
If you’re using Cineon, you’re already in ACES territory.
ACES is built into Cineon’s color pipeline. When you apply a film emulation or work in the color grading tools, the underlying rendering is happening in ACEScg — which means you’re getting the highlight behavior, the natural color desaturation, and the extended dynamic range without having to set any of it up manually.
The film stocks in Cineon were designed to respond to ACES lighting. That’s why they look like film: the physics of how light interacts with tone curves, the way highlights compress, the characteristic grain structure — all of it assumes scene-referred linear input. When your footage or still is processed through Cineon, it’s going through the same pipeline that production facilities use for feature films.
This isn’t a checkbox. It’s the foundation of why the output looks the way it does.
The honest version of the learning curve
ACES takes some adjustment.
Pixel values above 1.0 take getting used to. Lights need to be thought of in real-world terms — which means more realistic values but also more care in setup. The first time you see your normal maps scrambled from a bad conversion, it’s confusing.
But the adjustment period is short. And what you get on the other side is renders that you don’t have to fight. Images where the light behaves like light, where skin tones hold up under brightness, where shadows have structure instead of collapsing to black.
It’s the closest a digital renderer gets to what a cinematographer sees when they shoot on film.
That’s the point.